
The HP OfficeJet Pro 9132e driver download for Windows 11, Windows 10 (32-bit and 64-bit) is the HP OfficeJet Pro 9130 series EasyStart Printer Setup Software – Offline Use Only, and for a Mac HP lists the package titled “Install HP app to complete setup and support”. This page lists HP’s official software for the HP OfficeJet Pro 9132e All-in-One.
Recommended OfficeJet Pro 9132e driver downloads
Files download directly from HP’s official servers. hpdrivers.net does not host or modify them.
Which Windows package does the OfficeJet Pro 9132e driver need?
These are the main types of Windows package that HP lists specifically for the OfficeJet Pro 9130e All-in-One:
- Firmware update (v6.23.6.41, Jul 08, 2026): updates the printer itself, not your PC.
- Full software solution (v58.2.1857, Nov 16, 2023, 346.1 MB): HP’s setup package for printing and scanning only. For faxing from the PC, HP lists the Universal Fax Driver.
OfficeJet Pro 9132e driver: all packages
OfficeJet Pro 9132e driver for Windows
File details
File:OJP9130_OJP9130e_6.23.6.41.exeFile details
File:HPEasyStart-16.2.4-OJP9130_58_2_1857_Webpack.exeMac firmware utility for the OfficeJet Pro 9132e
File details
File:OJP9130_OJP9130e_6.23.6.41.dmgScanning and OCR software
Setup tools and other software
Of the two Universal Fax Driver packages, HP intends the installer for client PCs and the Driver Only package for server PCs.
Which systems the OfficeJet Pro 9132e driver supports
HP’s download list for the OfficeJet Pro 9132e names Windows 11, 11 on ARM64; Windows 10, 8.1, 7 (32-bit and 64-bit); macOS 26, 15, 14, 13, 12, 11. On a Mac the setup runs through the HP app.
HP’s specifications name Windows 11 and Windows 10 as the compatible desktop versions of Windows. For older versions, the list has no printer setup package.
Installing the OfficeJet Pro 9132e driver
To install it, follow these steps.
- Pick the setup file from the table above.
- Run it and follow the on-screen instructions.
- Choose your connection when the setup asks.
- Print a test page to confirm the connection.
For step-by-step instructions, see our guide to installing an HP printer driver.
Firmware update 6.23.6.41
For the OfficeJet Pro 9132e, HP lists the HP OfficeJet 9130-9130e/HP OfficeJet Pro 9130-9130e All-in-one Printer series Firmware Update, version 6.23.6.41, released Jul 08, 2026. HP’s notes for it: Security fixes; General enhancements and bug fixes.
- Keep the printer and the computer switched on until the update has finished.
Specifications that matter for setup
Ink supplies HP lists for the OfficeJet Pro 9132e
HP’s specifications name these replacement supplies for the OfficeJet Pro 9132e:
- HP 937 Black Original Ink Cartridge (~1,250 pages) 4S6W5N
- HP 937 Cyan Original Ink Cartridge (~800 pages) 4S6W2N
- HP 937 Magenta Original Ink Cartridge (~800 pages) 4S6W3N
- HP 937 Yellow Original Ink Cartridge (~800 pages) 4S6W4N
- HP 937e EvoMore Black Original Ink Cartridge (~2,500 pages) 4S6W9N
- HP 937e EvoMore Cyan Original Ink Cartridge (~1,650 pages) 4S6W6N
- HP 937e EvoMore Magenta Original Ink Cartridge (~1,650 pages) 4S6W7N
- HP 937e EvoMore Yellow Original Ink Cartridge (~1,650 pages) 4S6W8N
What comes in the box
HP lists these items with the OfficeJet Pro 9132e:
- HP 937 Setup Black Ink Cartridge
- HP 937 Setup Cyan Ink Cartridge
- HP 937 Setup Magenta Ink Cartridge
- HP 937 Setup Yellow Ink Cartridge
- Power Cord
- Regulatory Flyer
- Ink Caution Flyer
- Setup Poster
- Reference Guide
Paper handling and hardware details
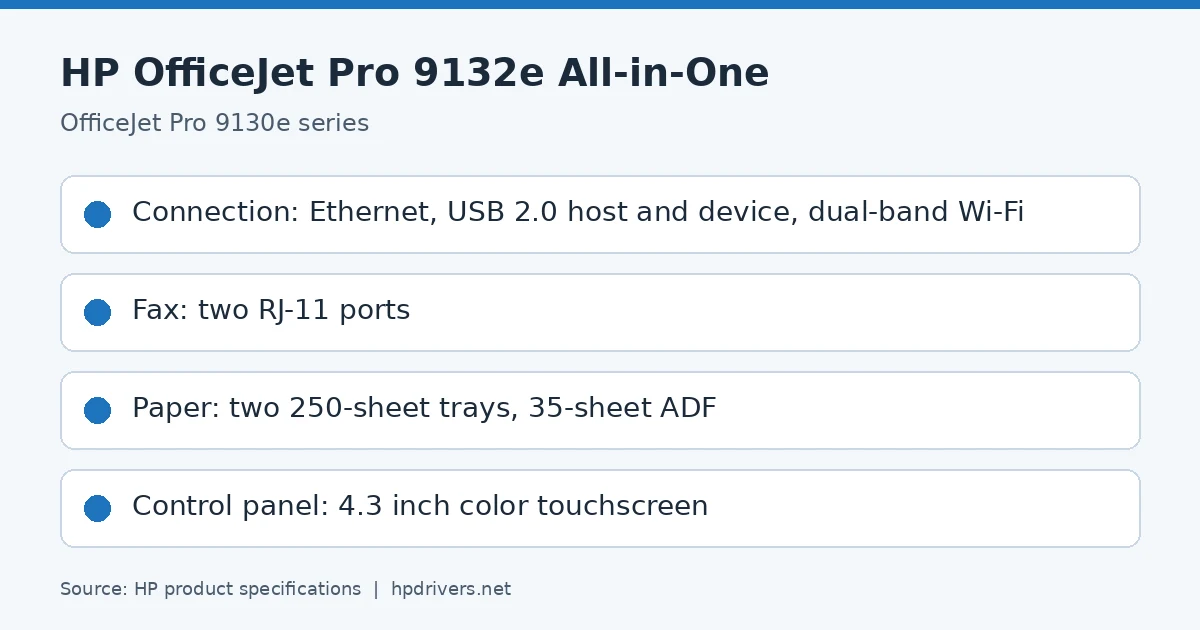
Values below are HP’s published figures for the OfficeJet Pro 9130e All-in-One series, which the OfficeJet Pro 9132e belongs to.
Loading Tray 1 and Tray 2
Tray 1 takes envelopes and cards in addition to paper. However, Tray 2 supports only plain paper in A4, Letter, or Legal size. Do not load either tray while the printer is printing.
- Open the tray and slide the paper guides to the edges.
- In Tray 2 only, press and hold the button on the paper-length guide and slide it toward the tray edge as far as it goes.
- Insert paper print-side down, aligned with the size indicators and below the stack-height marking.
- Adjust the guides to touch the stack, then close the tray gently.
- Keep or change the paper settings on the control panel to match the loaded paper.
- Pull out the output tray extension.
For Legal in Tray 2, press the button near the front of the tray to extend it. When you push the tray back in, the extension stays outside the printer.
Printing fax reports and logs
By default the printer prints no notification report. Turn on Fax Send Notifications or Fax Receive Notifications to find out whether a fax went through. The reports below are printed on request.
- On the Home screen, touch Menu.
- Scroll to Utilities and touch Tools.
- Choose Reports, and then Fax Reports.
- Select one or more reports, and touch Print.
- Billing Codes Report: every billing code and the faxes charged to it.
- Fax Trace Report: details that help resolve fax transmission problems.
- Blocked Fax Report: the list of blocked numbers.
- Fax Activity Log: the latest fax call records.
- Fax Call Report: the status of the last fax call.
Blocking unwanted fax numbers
The printer compares an incoming number with the Blocked Fax Numbers list and does not receive a fax from a match.
- On the Home screen, touch Menu.
- Scroll to Utilities and touch Settings.
- Choose Fax Settings, Fax Receive, and then Blocked Fax Numbers.
- Select the number to block and touch Add, then touch OK.
To unblock a number, follow the same path, select it, touch Remove, and touch OK. Follow the on-screen instructions after each change.
Scanning from the OfficeJet Pro 9132e without the driver
The printer can scan and share to the cloud, email addresses, network folders, a computer, or Microsoft SharePoint sites. It must be on the same network, and the control panel explains the setup.
- Load the original print-side down on the glass or print-side up in the document feeder.
- On the Home screen, touch Scan and choose the destination you want.
- Follow the on-screen instructions to finish the scan.
Two routes need no printer software on your computer. Scan to USB saves straight to a USB device, while Web Scan runs in a browser through the EWS. Web Scan is off by default, so switch it on in the EWS first.
Improving print quality
The guide’s order is to check supplies and settings, then print a diagnostic and act on what it shows.
- Make sure you use Original HP cartridges that are not low on ink. HP+ printers require them, and they also need an HP account and an Internet connection.
- Select the right paper type and print quality.
- Print a Print Quality Diagnostic Report and read it.
- Fix what it shows: align the printheads if lines are not straight and connected, clean them if thin white lines cross colored blocks, and clean the smear if ink marks the back of the printout.
To run these fixes, load unused plain white Letter, A4, or Legal paper in the tray, then go to Menu, Utilities, Tools, Troubleshooting, and Print Quality. If nothing helps, contact HP support.
Clearing jams
Start by removing the output tray. In Tray 1, press and hold the two buttons on both sides of the output tray, pull the tray out, and take Tray 1 out as well.
- Look inside where the trays were and remove the jammed paper.
- Push Tray 1 back until it clicks, and insert the output tray.
- If paper is still stuck, check the print zone.
For Tray 2, pull it out completely, remove any paper in the opening, and push the tray back in. Then press the tab on the rear access door, open it, remove any paper there, and close the door.
Restoring settings to factory defaults
Restore Settings has four options: network settings, user settings, user data, and all factory defaults. Because each option discards different changes, choose the one that matches what you want to undo. After a restore on an HP+ printer, register it again with the HP account used during first setup.
- On the Home screen, touch Menu.
- Scroll to Utilities and touch Tools.
- Choose Maintenance, and then Restore Settings.
- Select the feature and change the settings you want.
Similar models
This page covers the OfficeJet Pro 9132e only. The OfficeJet Pro 9130e has its own page.